This is part two of a tutorial. For part 1, click here.
Step 7
Cut around your pieces, leaving 3 - 4 mm around the edges. Clip the curves
Step 8
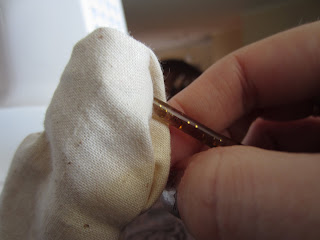
Using a crochet hook or similar (the finer the better), carefully turn your pieces inside out. I won't lie, this is very frustrating, so make sure you have some patience handy!
Step 9
This step gives the tail some shape and structure. Carefully stitch around the outside of the tail piece, sewing stripes along the fin for a detailed look.
Step 10
I love sharpies! My hubby sometimes brings me one or two home as a little pressie, such is my adoration of them! You can use fabric markers if you like, but these are cheap and just as effective. Be bold, draw that mermaid face in! Of course, you might be more careful than me and have a practise on a piece of scrap first, but I always think there's nothing like diving in. That's probably why this mermaid looks a bit cross-eyed!
Step 11
Lightly stuff both pieces - starting with the head and arms. I overstuff the head a teeny bit to give it a fuller shape. The back end of a crochet hook also helps to get stuffing right down to the hands.
Step 12
Trace and cut out your hair pieces. I used felt for structure and because it doesn't fray.
Step 13
Using colourful cotton (I used silver and red) sew in some hair strands. You will need to sew strands on each piece separately. Join the two pieces together using a row of stitching around the outside only.
Step 14
When the two pieces are joined, you are ready to slip your wig on your mermaid!
Step 15
Stuff the body inside the tail, add the wig and secure using hand stitching. Then you are ready to decorate!
Click here to see some variations on this pattern.
_______________________________________________
Please let me know if you made a mermaid! Feel free to make them for friends and family or to sell on your craft stall. If you'd like to share this with a friend, please send them on over to take a look!


No comments:
Post a Comment